Process model
Elements
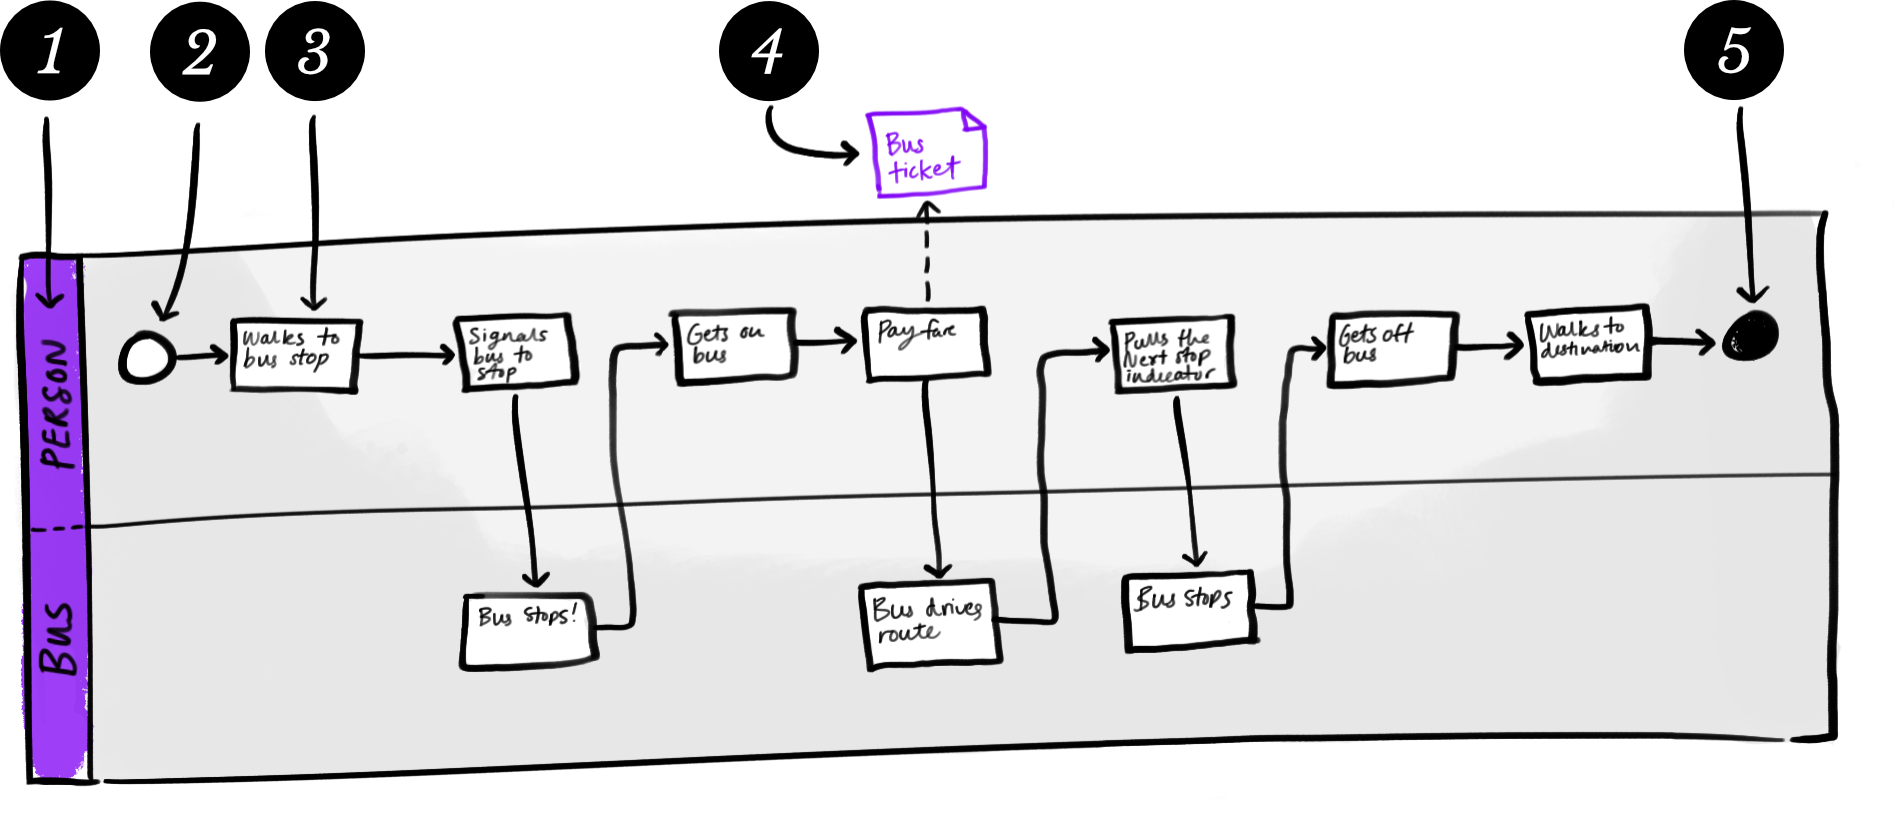
- Swim lane: People aren’t necessarily directly represented in a process model, but when there are different persons or groups involved, you can use swim lanes to show who does which activity. When a process model has these divisions, you can call it a Swimlane Diagram.
- Start: Marks the start of the process and usually defines the starting state and/or process prerequisites.
- Activity/Task: An action taken by a user or a group in the process.
- Output: An artefact of the process. This might be a paper document or report, an electronic message, data, or email. Think of outputs as things that show that the process occurred.
- Process end: Marks the end result of the process and usually has a description of the end state.
Optional: Pools group many activities together into a sensible set. Use pools to group related swim lanes into a set, or to show that some activities are related to each other.
What it is
Process modelling summarises the complexity of a process into a simple flowchart-style visual. It documents the sequence of activities or events in a workflow, who is involved in those events, and when they occur.
While a set of specifications or requirements can frighten many people, a well done process model is understandable by almost anyone. It is the best method available to document a workflow, or to share a future-state process. And it’s a powerful analysis tool for optimising processes. Process models are very flexible, can be as simple or as complex as required.
When to use it
- Use a process model when you’re optimising or automating an existing process.
- Use a process model when you’re designing and standing up a new process.
How to use it
- Start at the start! Draw a circle on a page and write the starting state or beginning trigger.
- Work with a person who does the process (a subject matter expert) and ask them, “What happens next?” Capture the step in a new activity box.
- Ask, “What does that involve?” Jot down any details provided.
- Ask, “After you’ve done this step, what do you do next?” Work your way through the process until you reach the end of the process or the end of that person’s part in it.
- Add detail. Work back through the process with your subject matter expert to gather more details and establish the exception flows, i.e., Does this ever go wrong?
- Tidy and level your process. Working alone, re-model the information you have gathered into a clean and sensible working draft.
- Repeat the above steps with other people who do the process or other parts of the process.
- Validate. At multiple stages throughout the process, validate your process model with the subject matter experts to ensure that nothing important has been missed.
- Optimise. Optionally, look for steps that create delays, are time consuming, or could be simpler. Redraft the process into an optimised state!
Note: This assumes an existing process rather than a new design.
Rules for use
- An activity must be a discrete thing—something completed by a single person or team.
- A model must always have a starting point and an ending point.
Guidelines
- Write the model in the language or idiom of the people who do the process.
- Keep the process simple: exclude extraneous information whenever possible.
Tips & tricks
- Keep everything at the same level. Don’t be afraid to make sub-process models to keep unnecessary detail out of the main flow.
- Use your work in progress. People are more likely to provide feedback if it doesn’t look complete.
- Give the pen away. Try drawing the process on a whiteboard and give your subject matter expert the pen. Encourage them to cross out lines and edit boxes. You’ll have to tidy up the results, but you’ll have gathered heaps of information.
- The person who does the activity is the source of truth. Don’t dismiss information about a process from any other source: capture everything but validate the information with the activity owner.
- Consider your audience. Including all the details may simply create noise for the reader. Consider building a custom view for some audiences that shows only what is relevant to them.
- Most of the work involved in doing a great process model is filtering the information for the important points. Deciding what to leave out is as important as deciding what to include.
- Need more notations? There’s an industry convention for process modelling called BPMN with a notation for every scenario you can imagine. Use wisely.
Common issues
- Including unnecessary detail. Make sure you aren’t explicitly calling out unnecessary detail in a model. Where possible, aggregate tasks and activities to retain sense while reducing noise. You can always capture the next higher level of detail in a sub-process.
- Not levelling your model. Having activities and tasks of different sizes included in the same model makes the model harder to understand.
- Solo-process-modelling. Unless you are modelling your own personal processes or designing a process entirely from scratch, process modelling should be treated as a collaborative elicitation exercise. Assuming that you understand what someone else’s job is generally doesn’t end well!
- Leaving out exception flows. Complexity in a process often arises from exceptions. Make sure you establish what can go wrong in a process, and what happens when it does.
- Mistaking the model for the process. A process model is an abstraction of a real process. To provide everything you need to know and nothing more, the process will always leave some details out.
- Self-indulgent models. The purpose of a process model is to represent and communicate a process. Unnecessarily complicated notations can get in the way of that.
Related methods
- State diagram: define your entity’s lifecycle.